


New analytics option unlocked: Matomo
Save time with and gain data based insights by using Cal.com with Matomo
Existing customer? Login
Get StartedThe workplace is evolving. It's changed from a fixed element to something much more dynamic.
It can be a co-working space, a hybrid and remote environment, or a distributed and fully asynchronous endeavor.
Organizations and people they’re made up of are now able to connect and collaborate on a global level. This has allowed businesses to attract and keep more star players than ever before.
However, none of this would be as frictionless as it currently is without a calendar scheduling infrastructure products like Cal.com or next-generation video conferencing platforms like Roam.
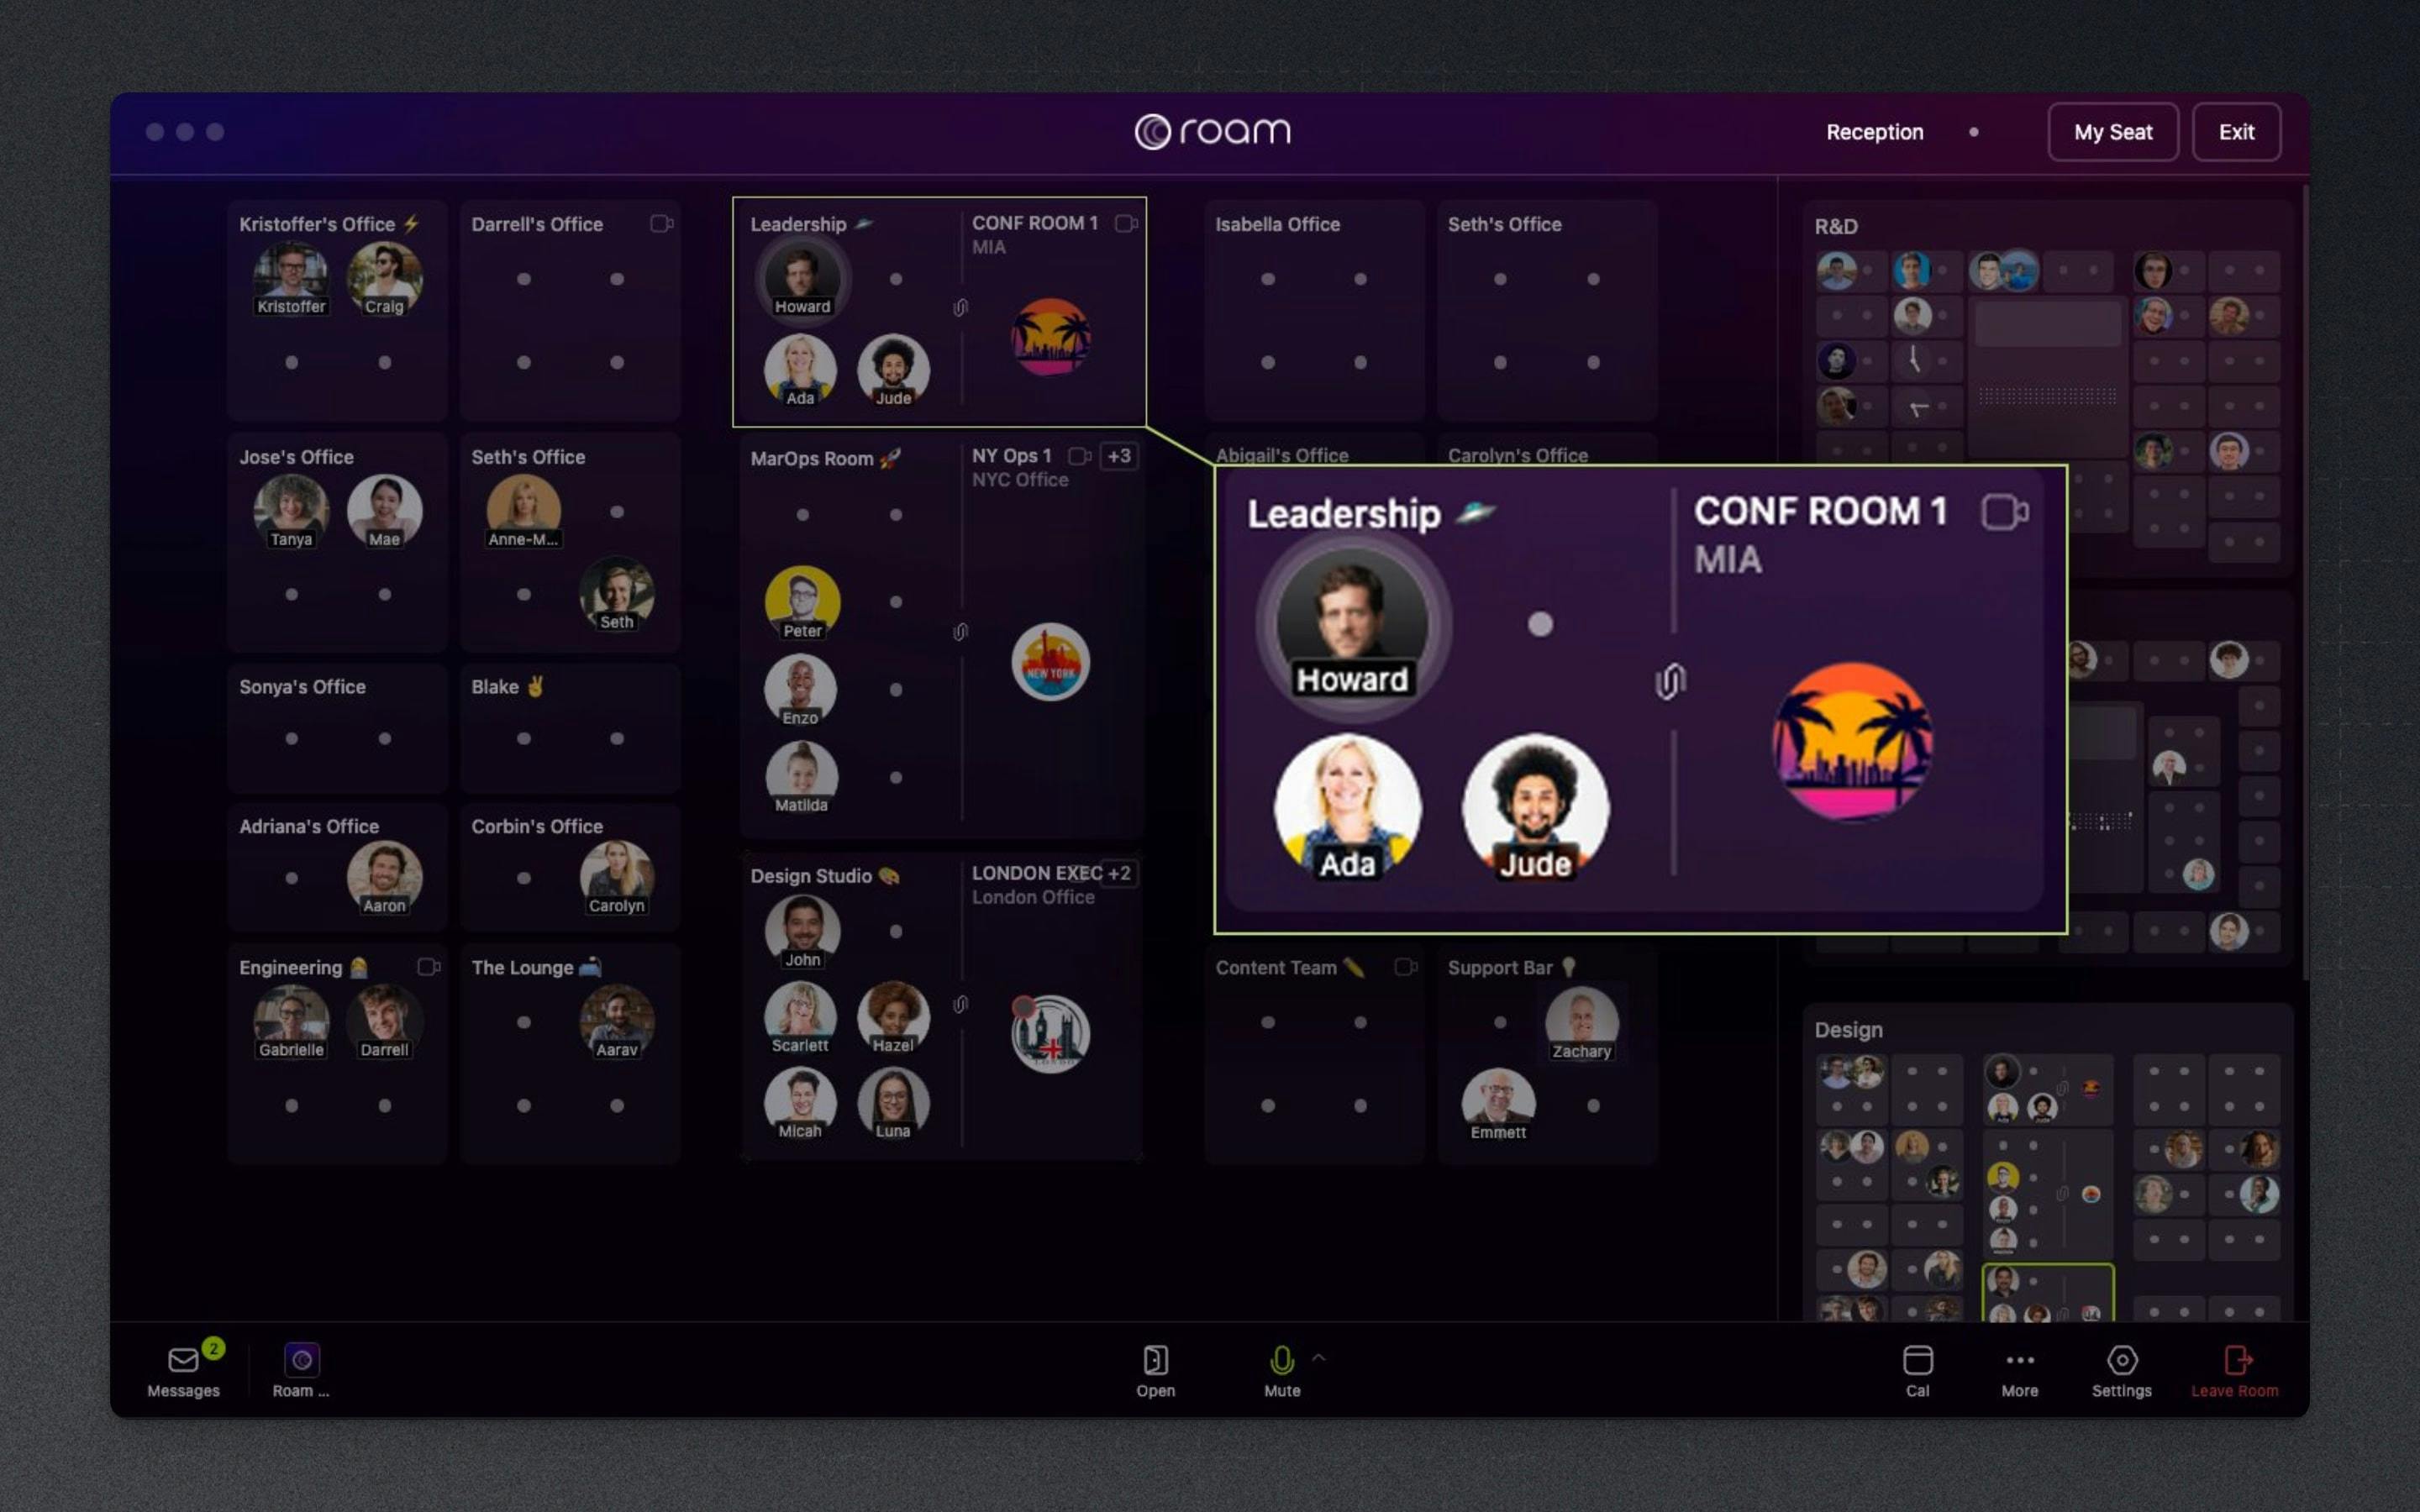
Roam is more than just a teleconferencing platform; it's a virtual HQ that organizations of all sizes can use. Roam makes it easy for coworkers to see who's available for a meeting, catch up with the latest developments at the office, and issue free virtual guest passes.
One of the nice things about Roam is that the platform is priced according to usage. Organizations are charged a fixed amount per user, and if an employee doesn't use the service, then the organization won't be billed for that person. This practical approach to pricing helps to ensure that each organization only pays for what it actually uses.
All Cal.com users have the option of adding Roam as an integration within their calendar scheduling environment. Doing so is a great way to enhance workflows for distributed teams by making it easy for coworkers to communicate and brainstorm in real-time.
Before we get started with setting up this integration, it's important to keep one or two things in mind. First, this integration will not work if you don't have a Roam account, so it's a good idea to go over to Roam and sign up for one before starting. Second, once you finish installing Roam, it can be used with any event as long as it’s been selected as a meeting location. Don't worry, if you’re Unsure as to how to complete any of these steps since all the information is included below.
Log in to your Cal.com account.
On the left-hand side of the screen, you'll see a navigation bar.
Click on the item labeled "Apps."
Select "Conferencing" from the featured categories.
Please scroll down until you find Roam.
Click on Roam's detail button to continue.
Click on the black button labeled "Install App."
Select your event type dashboard.
This will once again be located on the navigation bar on the left hand of your screen.
You can either create a new event or edit a previously created one.
Now scroll down to the location setting.
Click on the drop-down menu.
Scroll through the options.
Select Roam.
You can now add your own booking link to the designated field.
Finally, click the save button in the upper right-hand corner.
Adding Roam to your Cal.com account is a simple process that can make a big change. It lets Cal.com users have access to a robust and dynamic virtual HQ that marries the best aspects of a physical office space with the freedom and flexibility of working in a remote, hybrid, or async environment.
Save time with and gain data based insights by using Cal.com with Matomo
A quick overview of one of the newest teleconferencing options available to Cal.comhttp://Cal.com users.


